Aside from being a renowned photographer, Ismail Sirdah is also a successful business owner and photography school instructor. He believes that without social media marketing he wouldn’t be where he is today. Sirdah has written various articles on how social media can help market your business, whether it is small or big.
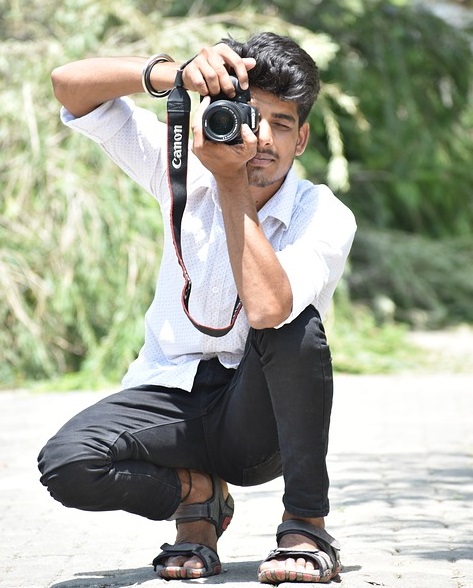
Ismail Sirdah is a talented photographer who is able to see beyond the lens. He also teaches his students to tell stories through their cameras. Sirdah is a firm believer that marketing your business, especially through social media greatly benefits a company’s visibility. Sirdah uses Facebook to market his services and sees tangible results because of it. He has even improved on utilizing Facebook Messenger’s automatic questions and answers for his current and potential customers, Sirdah is seeing big results for his company.
When Sirdah isn’t teaching or photographing subjects and events, you can find him traveling and tell his own stories. He loves visiting historical sites as well as tropical countries.
You can read more about how Ismail Sirdah uses social media and Facebook to increase his business by visiting here: https://www.noobpreneur.com/2018/02/05/why-you-need-to-be-using-facebook-messenger-for-your-small-business/
There is absolutely no doubt about it. Photography is a special thing, and that is saying the very least below an understatement. The ability to capture thoughts, emotions, and feelings, not to mention un-repeatable actions, within a single small still frame, is truly no less than a miracle at best. In fact, it is the very reason why some have chosen to devote their entire lives to this pursuit. Beauty is in any art, and with photography, it is no different. Professional Photographer, Ismail Sirdah has some tips on how to photograph splashing water.
Did you ever just stop to ask yourself exactly how all of this happens in one or two seconds? Well, that is a part of the mystery in the beauty itself, the ability to capture motion in a photograph and to keep it in one’s heart forever. For it is not an easy task, no, far from it. In fact, if you thought that shooting any still frame alone and capturing it just perfectly was a challenge difficult enough both in and of itself, then you have still quite a bit of learning to do in this field of expertise. For there is something far more difficult to pull off, and that is taking a photo of moving liquid or water when it is in motion.
Doing This “Just Right”: It May Take a Bit More Than a Try
“The setup is probably the most important part in taking a water splash photo. The first thing to do is get your backdrop and surface ready. Once you found your surface make sure the backdrop right behind it. Setup your camera. What you want to do at this point is make sure all the camera sees is black….”
After this has been prepared and adjusted as you see fit, you will want to set your camera’s different apertures to any range from around f/4 to 300 Isotopes per second as is the suggested range. Next, do not use JPEGS when choosing final image layouts. RAW files have always tended to work better and have always given that extra bit of clarity to the finished photo’s overall look. Have all forms of flash, plus reflecting equipment, on and set at a proper angle. Take a few practice shots from different angles to best decide what exactly that may be for you and your visual taste in particular.
Also, you will then want to set a timer. The proper timer and its amount are crucial to the success of that perfectly captured image. This cannot be stressed enough. Do not forget that practice makes forget, and trial and error are wonderful teachers to be had in all of life’s first experiences. Play around with your camera and equipment on these settings until you get that perfect shot to your very own liking.
When you are ready, drop an apple into a water cup or full bathtub for the motion. Capture. Re-capture. Repeat. Re-edit.
Black and white photography has a timeless charm that is completely unique from its colored counterpart. It is quite interesting that without color, black and white photography highly relies on play of shadow, contrast and exposure. Black and white photos also can tell a story that stands out from the rest, and definitely creates a different effect that is unique to its monochromatic features. In this post, we will be talking about the benefits of Black and White Photography, and some tips that can help us create stunning black and white photos.
Benefits of Black and White Photography
Creating dramatic effects
Black and white photography can create special effects because of its greyscale properties. Hence, these photos can be more subtle, dramatic, and can highlight certain features of a photo’s composition with the absence of many colors.
Emphasis on lighting
With black and white photography, you can harness the power of good lighting. Since you won’t rely on colors that can enhance a photo, you will be relying on lighting effects, and you can experiment on different lighting styles to create your black and white photo.
Good variety along with colored photos
If you have clients who want multiple photos, it can be ideal to provide black and white as well as colored versions of certain photos. Since black and white photos can be more dramatic and can give highlight to certain features that may go unnoticed with colored photos, it can serve as a good variety to mix up in a client’s image set.
5 Tips for Amazing Black and White Photography
Here are some things you can do to create beautiful black and white photographs.
Focus on shapes and textures
Look for angles that highlight a subject’s position against a background, the uniqueness of its shape or texture. For example, creating travel photography, you can create black and white versions of images by taking photos of an infrastructure with interesting shapes and textures against a plain background. This can exude a more dramatic effect for your photos.
Create a high contrast set
If you are doing studio or still life photography in black and white, it is important to create sets that are usually high contrast. The more difference between an image’s monochromatic features, the more attractive it is as a black and white photo. You can manipulate this by making use of studio lights and placing them in certain angles or cast or remove shadows depending on your preference.
Try increasing your exposure
In situations where you can’t manipulate a set’s lighting, you can adapt by increasing your camera’s exposure. Creating long exposures, especially for darker sets can help you create a contrast that you won’t usually achieve in regular conditions. This results to a better black and white photo for nature photography with dim light conditions. Make sure to use a tripod for situations you would need long exposures, to prevent blurring of photos.
Make use of filters
It can also be helpful to utilize a camera accessory such as polarizing and Graduated neutral density filters to help you retain details on a photo white increasing the contrast between its black and white tones. Through the use of filters, you can also increase the contrast in a photo’s black and white features without compromising small details such as textures or small objects than can be obscured through the absence of color. Colored filters, such as red and orange ones during a shoot can also be helpful if you are a film photographer who wants a better black and white image during processing.
Dodge and Burn Tool
Another trick that you can do during image editing and processing is the use of dodge and burn tool. If you have a photo that was originally taken from colored, but looks less appealing in black and white, you may want to make use of the dodge tool to create highlights and burn tool to create shadows. There are 3 settings for both features: highlights, midtones and shadows. You can pick which lighting aspect needs to be lightened or darkened depending on your photo, and what results is a black and white image with better contrast.
Black and white photos have their own uniqueness that can only be achieved by doing specific tricks. Making use of these tips will help you produce black and white images that are beautiful and one-of-a-kind for your clients.
Author Bio:Ismail Sirdah is a professional photographer. He is an established photographer that has gained recognition in his earlier years through the feature of his work in several local publications. He was also able to cover events featuring several media personalities and public icons.

 Ismail Sirdah is a talented photographer who is able to see beyond the lens. He also teaches his students to tell stories through their cameras. Sirdah is a firm believer that marketing your business, especially through social media greatly benefits a company’s visibility. Sirdah uses Facebook to market his services and sees tangible results because of it. He has even improved on utilizing Facebook Messenger’s automatic questions and answers for his current and potential customers, Sirdah is seeing big results for his company.