Tana-Taylor-Adoption

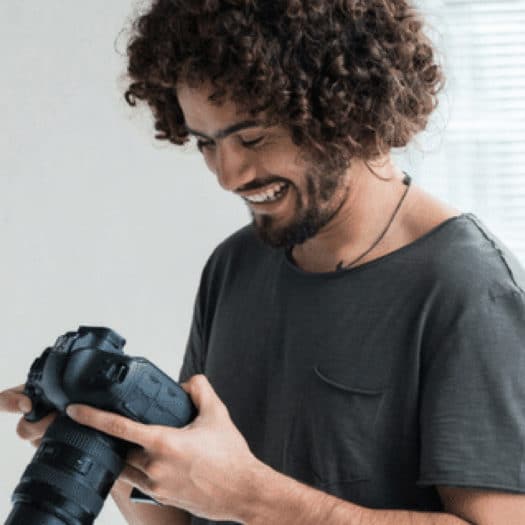
Best 5 Tips On How To Communicate With Your Photography Clients

When starting a photography company, there are a lot of things to consider. Factors such as branding, knowing who and where to market, and communicating well with your clients are all important things to consider when you are a self-employed photographer.

In many instances, the cause of frustration for clients is brought about by miscommunication before and during the photo shoot sessions. Many things may be unclear such as pricing, contract agreement, venue, expectations, and others.

Tana Taylor Adoption, a known company that specializes in and adoption photography, gives us their best tips on how to communicate better to photography clients.

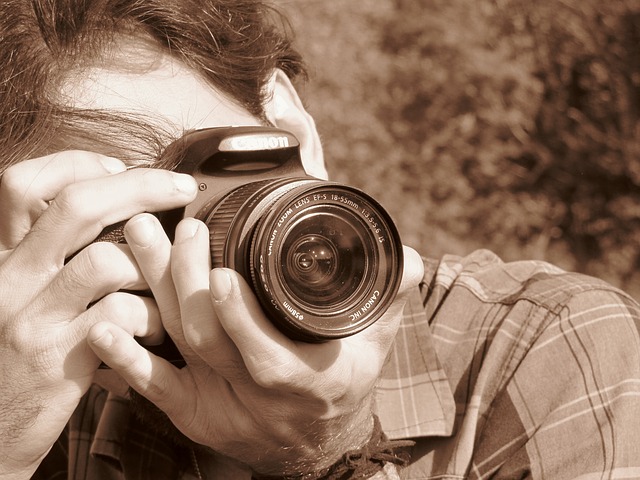
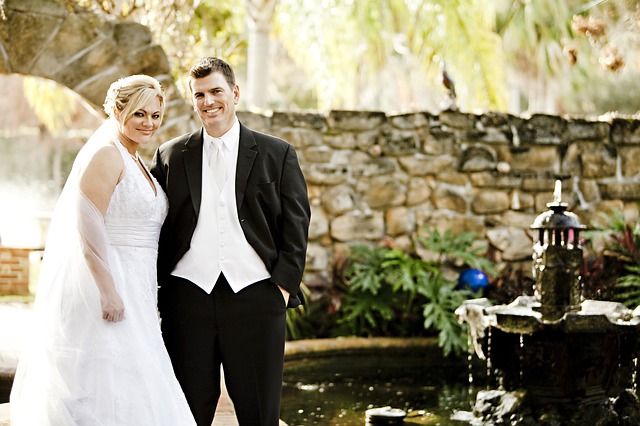
Provide samples of your work.

Before accepting an agreement between a client, you need to set their expectations straight. They must get a “feel” of your creative style, and if their preferences suit this specific style. Some clients would be rushing in the process that they forget to consider if their choices are suitable for what you have to offer.

Thus, it is important to show your work initially by sending in samples from old clients. Needless to say, show your latest projects because photography styles evolve over time.

Provide a clear budget.

It is not advisable to say that it’s up to the client to set up their price or your price is negotiable. Although in some instances this may work, most of the time it causes confusion and blurry expectations about the pricing.

According to Tana Taylor Adoption, setting a standard price sets you apart from the rest. It helps you position yourself as a business who knows what they are doing and have clear-cut prices for each service you offer. There are many ways to go about standard pricing. First, you can create packages of your services–some photographers like categorizing them per event such as wedding package, birthday package, etc. Some try to package it by amounts such as 100 candid shots and 50 professional shots.

It all depends on how you want, but standard pricing will help to set things straight about payments and expectations.

Set up appointments and call times.

Preparation is essential when it comes to photography, whether it’s an event or something done in a studio. At least 1-2 weeks prior to the event, it may be helpful to set a date and time to come in early and do some preparations.

Some photography sessions need more preparations such as nuptial and prenuptial shoots, and others require less such as birthdays and corporate events. Also, consider the time you will be setting up your equipment if you have a large production team.

Give reminders of what clients need to bring on shoot day.

If clients need to bring something, such as payments, props, their own makeup team, or something else, give reminders. Often, some clients tend to forget these details especially if they are preparing for a big event.

A day before, it would be good to provide reminders of what your clients need to bring so that your sessions will be smooth-sailing.

Give a short brief on shoot day.

Tana Taylor Adoption also suggests making a short overview of the things you will be doing in the photo shoot. This is important to help keep the whole team in check with their schedule, and how they can work around it to meet what is needed. If time is flexible, shortly discuss the activities that you will be doing for the day.

As you consider these tips, you will have greater chances of communicating effectively with your photography clients.

Ismail-Sirdah

Ismail Sirdah Shares How To Photograph Splashing Water

The Effect of Motion In Photography

There is absolutely no doubt about it. Photography is a special thing, and that is saying the very least below an understatement. The ability to capture thoughts, emotions, and feelings, not to mention un-repeatable actions, within a single small still frame, is truly no less than a miracle at best. In fact, it is the very reason why some have chosen to devote their entire lives to this pursuit. Beauty is in any art, and with photography, it is no different. Professional Photographer, Ismail Sirdah has some tips on how to photograph splashing water.

Did you ever just stop to ask yourself exactly how all of this happens in one or two seconds? Well, that is a part of the mystery in the beauty itself, the ability to capture motion in a photograph and to keep it in one’s heart forever. For it is not an easy task, no, far from it. In fact, if you thought that shooting any still frame alone and capturing it just perfectly was a challenge difficult enough both in and of itself, then you have still quite a bit of learning to do in this field of expertise. For there is something far more difficult to pull off, and that is taking a photo of moving liquid or water when it is in motion.

Doing This “Just Right”: It May Take a Bit More Than a Try

“The setup is probably the most important part in taking a water splash photo. The first thing to do is get your backdrop and surface ready. Once you found your surface make sure the backdrop right behind it. Setup your camera. What you want to do at this point is make sure all the camera sees is black….”

After this has been prepared and adjusted as you see fit, you will want to set your camera’s different apertures to any range from around f/4 to 300 Isotopes per second as is the suggested range. Next, do not use JPEGS when choosing final image layouts. RAW files have always tended to work better and have always given that extra bit of clarity to the finished photo’s overall look. Have all forms of flash, plus reflecting equipment, on and set at a proper angle. Take a few practice shots from different angles to best decide what exactly that may be for you and your visual taste in particular.

Also, you will then want to set a timer. The proper timer and its amount are crucial to the success of that perfectly captured image. This cannot be stressed enough. Do not forget that practice makes forget, and trial and error are wonderful teachers to be had in all of life’s first experiences. Play around with your camera and equipment on these settings until you get that perfect shot to your very own liking.

When you are ready, drop an apple into a water cup or full bathtub for the motion. Capture. Re-capture. Repeat. Re-edit.

d-scott-carruthers-smartphone-pictures

10 Tips for Taking the Best Photos with a Smartphone Camera

d-scott-carruthers-smartphone-pictures

Whether looking to take photos of people, events, or products for a small business there tend to be two different schools of thought regarding the use of Smartphones as a camera. The majority of us have seen the comments on various Websites calling for everybody to use a digital SLR camera and lenses but superior results can be obtained using a Smartphone as a camera. D. Scott Carruthers explains how to take the best photos with your cellphone.

Choosing the right phone

The starting point for any photoshoot is to make sure the equipment being used is the correct quality and capable of completing the job it was chosen for. Modern Smartphones have at least eight megapixels of resolution and a range of features which may or may not be important to the photographer; at least eight megapixels are required to create high-quality photos which can be viewed via a screen or printed for a physical print.

Avoid the zoom features

Many Smartphone manufacturers make a feature of the ability to zoom to a high rate but individuals should avoid using this feature on a regular basis as a loss of resolution can be a major problem. Instead of using the zoom feature included on most cameras it is a better idea to take a photo before using editing software to crop the image and reduce the loss of resolution seen when the zoom is used. A large amount of information and focus can be lost when the zoom is used resulting in the pixelated look seen on many images which provides a blocky look to the images.

Accessories are important

Many Smartphone users believe it is as simple as pointing and shooting to get the best image using the camera included on a phone but a little planning can aid any photographer in getting the best image. Investing in a few simple accessories can make all the difference in taking a photo to be proud of including a small tripod providing stability for any photographer looking to create the highest-quality image available. A tripod helps eliminate the issue of camera shake and can be purchased for a low price to create a better quality image on a regular basis.

Use built-in features

Framing a shot is something many first-time photographers struggle with and can leave them frustrated with the images they create. Taking a look at the cookbook and Website of D. Scott Caruthers offers a glimpse into how shots should be framed. D. Scott Carithers is a respected food critic and writer who has a long history in the restaurant industry to call on for his recipes. Most Smartphones have a built-in framing feature including a grid which can be called up and used to line up an image with the position where the lines intersect the perfect spot for framing an image.

Download an editing app

The use of Instagram filters has become a major problem for many Smartphone photographers who are looking for the best way of improving the images they take. A high-quality editing app offers a better option than filters which do not provide the same level of control seen in the majority of editing apps.

Avoid the flash

One of the major problems many Smartphone camera users become annoyed with is the bleaching out of skin created by the brightness of the flash found on most phones. There are many problems with the use of flash including the strobe effect found on most cameras which can result in a blue hue to the skin of most people; a better option is to find a source of natural light and have the subject facing this direction.

Consider setting and background

When taking a photo with a Smartphone many people focus solely on the subject and fail to consider the background of their image which will be a major talking point when the image is viewed on a larger screen. Choosing a setting which looks professional and does not distract from the subject is always an important aspect of taking a high-quality image.

Play with lighting effects

It has become a major trend of recent years to create images with a large amount of lens flare across them which can result in an artistic looking image or one where no details are visible. Moving the source of light to the edge of the lens will result in a flare spreading across the image which can be made larger or smaller with added movement, playing with this natural feature can add that he feel of an image.

Autofocus should be used with caution

The subject of an image may not always be in the foreground of an image and remain blurred when a Smartphone user allows autofocus to remain in play. Focusing on an image by pressing the screen over the position of the subject will alter the focal point and allow the depth of field to be altered for a higher quality image.

Print images regularly

Holding a physical print of an image is one of the best feelings when a high-quality image has been produced using a Smartphone. Printing images means they will not be lost or removed from a phone when storage space is low or a phone is damaged or broken.

There are many options for taking a Smartphone image to rival images produced with a digital SLR camera. The development of lenses and accessories for Smartphones has seen the options increased for creating high-quality images in a way that makes the use of SLR cameras almost obsolete.

Avery Arjang

Avery Arjang Shares Why She Recommends Using Fluorescent Photography When Capturing Natur

Avery Arjang

Avery Arjang, a popular photographer, loves taking photos of nature and landscapes. Though she enjoys sharing her photos with the world, she also hopes to share her advice with photographers of all sorts. In fact, one of the biggest tips that Arjang has shared with the world is the use of fluorescent lighting when taking photographs of nature. Here is why she chooses to use this sort of lighting in her nature photography.

What is Fluorescent Lighting

You’ve probably seen these bulbs either in your kitchen or a building. Some street lamps even use them to keep the street eliminated. They are energy efficient bulbs that are also relatively inexpensive to use. While they are used highly in the normal world, they are very rarely used in photography. There is a reason why. Since fluorescent light has a different color and a flicker in the lighting source, it can make it difficult to use these for photography. However, Arjang thinks that fluorescent lighting is the key to getting incredible nature photos!

Finding the Good Light

Flicker has to be one of the biggest problems with fluorescent lighting, but when you figure out the change in the lighting, you can capture the best photos in the cycle. Flicker is a constant cycle where the lights change in intensity and color. The cycle is somewhere around 1/50 a second, and if you time your photo right, you can get some pretty interesting color changes. Many people will jump into fluorescent photography by setting their camera on the continuous shooting, but that often leaves people with photos full of distorted colors and light.

Arjang’s suggestion is to set your camera to a shutter speed of 1/50 a second to capture the full light cycle of the bulbs. Sometimes, this might mean playing around with the shutter speed to get the best photos of the cycle, and it might mean grabbing your remote shutter and a tripod to keep things steady during the exposure. However, since this is such a quick exposure, it might not require those things.

Playing with the Color

Fluorescent light can have some crazy colors, and if you’re not a fan of the harsh color, you can easily change it by changing the settings on your camera. Avery Arjang suggests putting your camera toward the light to see how the different colors and white balance can change the shades in the photos. Just one simple change of the white balance to daylight can produce a beautiful change in the photograph. When photographing nature, these subtle color shifts under the fluorescent light can make a huge difference in the quality of your photo.

How the Light Effects Nature

If you are photographing a green plant, and you are using fluorescent light to do so, you might find that it provides a greener effect to your photos. In other words, your photo looks more vivid. Arjang knows this to be true, which is why she prefers to use fluorescent lighting to bring out the vivid colors and details in nature photography.

When traveling outdoors to take nature photos, it can be handy to have a fluorescent ring light or light box to help bring the lighting outdoors. Some of these lighting options will even attach to your camera. Before snapping the photo, be sure to play with some of the lighting and color settings on your camera to ensure that you are capturing the best photo. Nature photography always looks better when it is vivid and full of bright colors.

Conclusion

When working with fluorescent lighting, it can seem difficult to get the perfect picture under such difficult lighting conditions. However, by changing just a few settings on your camera, you can easily grab a beautiful photo that certainly stands out. Arjang uses fluorescent lighting for her nature photography to help it stand out with vivid colors and details. Just by working with a few new settings and a light box, this photographer shares how you too can get gorgeous nature photos that look straight out of a magazine.

About Avery and Her Photography

An accomplished photographer, Arjang has been working with her camera for many years. She holds great knowledge of various photography skills, and she uses her knowledge to help new and aspiring photographers better grasp the concept of landscape and nature photography. Arjang uses a variety of settings and lighting designs that are unique and tasteful. Her photographs are gorgeous, showing off her excellent skills behind the camera’s lenses. Arjang has been practicing photography for years, and her skills have only grown since her beginnings. This is why she offers heaps of advice to photographers everywhere, and she encourages photographers to get out of their comfort zone, find something unique to shoot and take that photo with confidence.

Ismail Sirdah

Ismail Sirdah Shares 5 Tips For Amazing Black and White Photography

Ismail Sirdah

Black and white photography has a timeless charm that is completely unique from its colored counterpart. It is quite interesting that without color, black and white photography highly relies on play of shadow, contrast and exposure. Black and white photos also can tell a story that stands out from the rest, and definitely creates a different effect that is unique to its monochromatic features. In this post, we will be talking about the benefits of Black and White Photography, and some tips that can help us create stunning black and white photos.

Benefits of Black and White Photography

  1. Creating dramatic effects

Black and white photography can create special effects because of its greyscale properties. Hence, these photos can be more subtle, dramatic, and can highlight certain features of a photo’s composition with the absence of many colors.

  1. Emphasis on lighting

With black and white photography, you can harness the power of good lighting. Since you won’t rely on colors that can enhance a photo, you will be relying on lighting effects, and you can experiment on different lighting styles to create your black and white photo.

  1. Good variety along with colored photos

If you have clients who want multiple photos, it can be ideal to provide black and white as well as colored versions of certain photos. Since black and white photos can be more dramatic and can give highlight to certain features that may go unnoticed with colored photos, it can serve as a good variety to mix up in a client’s image set.

5 Tips for Amazing Black and White Photography

Here are some things you can do to create beautiful black and white photographs.

  1. Focus on shapes and textures

Look for angles that highlight a subject’s position against a background, the uniqueness of its shape or texture. For example, creating travel photography, you can create black and white versions of images by taking photos of an infrastructure with interesting shapes and textures against a plain background. This can exude a more dramatic effect for your photos.

  1. Create a high contrast set

If you are doing studio or still life photography in black and white, it is important to create sets that are usually high contrast. The more difference between an image’s monochromatic features, the more attractive it is as a black and white photo. You can manipulate this by making use of studio lights and placing them in certain angles or cast or remove shadows depending on your preference.

  1. Try increasing your exposure

In situations where you can’t manipulate a set’s lighting, you can adapt by increasing your camera’s exposure. Creating long exposures, especially for darker sets can help you create a contrast that you won’t usually achieve in regular conditions. This results to a better black and white photo for nature photography with dim light conditions. Make sure to use a tripod for situations you would need long exposures, to prevent blurring of photos.

  1. Make use of filters

It can also be helpful to utilize a camera accessory such as polarizing and Graduated neutral density filters to help you retain details on a photo white increasing the contrast between its black and white tones. Through the use of filters, you can also increase the contrast in a photo’s black and white features without compromising small details such as textures or small objects than can be obscured through the absence of color. Colored filters, such as red and orange ones during a shoot can also be helpful if you are a film photographer who wants a better black and white image during processing.

  1. Dodge and Burn Tool

Another trick that you can do during image editing and processing is the use of dodge and burn tool. If you have a photo that was originally taken from colored, but looks less appealing in black and white, you may want to make use of the dodge tool to create highlights and burn tool to create shadows. There are 3 settings for both features: highlights, midtones and shadows. You can pick which lighting aspect needs to be lightened or darkened depending on your photo, and what results is a black and white image with better contrast.

Black and white photos have their own uniqueness that can only be achieved by doing specific tricks. Making use of these tips will help you produce black and white images that are beautiful and one-of-a-kind for your clients.

Author Bio: Ismail Sirdah is a professional photographer. He is an established photographer that has gained recognition in his earlier years through the feature of his work in several local publications. He was also able to cover events featuring several media personalities and public icons.

How Selfies Are Reshaping The Future of Cosmetic Surgeries

Cosmetic surgery back in the day can be considered one of the ‘extreme’ measures of self-improvement. However, more and more people have become open to the idea that changing one’s face isn’t so bad. In a recent survey, 40% of patients by American Cosmetic Surgeons admit to going under the knife because looking better in selfies is a great incentive.

Aside from boosting one’s self-confidence in front of the mirror, many people have relied on social media as a form of an “ego-boost”. They post pictures of their recent travel destinations, gifts they received, cars they own, cute kids they have, and of course, beautiful faces that they possess. Having beautiful selfies has become a means to gain others’ approval through likes, loves, and comments.

“The recent boom in cosmetic surgery is fueled by the desire of people to look good in selfies, and social media as a whole,” Dr. Usha Rajagopal, a known Cosmetic Surgeon. What role do selfies play in the future of cosmetic surgeries and what does this say about us? Read on to find out more how selfies have influenced this industry.

How Selfies Are Reshaping The Future of Cosmetic Surgeries

1. Selfies made people more self-conscious about their appearance

Selfies are mostly close-up images of people. One known element of a selfie is good lighting, fabulous makeup techniques (or no makeup for that matter), and stylish clothing to match. Due to these close-up images, people have become more self-conscious of their appearance. Someone who might not have noticed her jaw may be completely bothered after looking in one of her selfies. Somebody who took a selfie might nitpick on his ‘larger than average’ nose and might even consider going through rhinoplasty to have it fixed. “Selfies have made people more self-conscious than ever, which motivates them to undergo cosmetic procedures,” Dr. Usha Rajagopal adds.

2. Selfies show people an ideal look for themselves

On a positive note, selfies can also be a way for others to find their ideal look. This can be beneficial when a person has been contemplating undergoing facial surgery even before taking the selfies. For example, if a person decides to take a selfie and finds some editing application for the skin, eyes, nose, lips and other facial features, he or she can create an ideal look that they want for themselves. This can be shown to cosmetic surgeons as a basis of how the clients want their face to be after the surgery.

3. Selfies of ‘influencers’ become a frame of reference

We all go crazy wanting to learn about the personal lives of our favorite celebrities. We can even go as far as trying to copy what they eat for breakfast or the brand of pajamas they wear during weekends. In essence, we like to imitate those we admire. And when celebrities post their selfies on Instagram or Twitter, it can also be a frame of reference for other people. Clients can tell their surgeons, “I want to have Kim K’s butt,” or “I want to have Angelina’s lips,” at a whim. Famous people and their selfies can be a frame of reference for cosmetic surgery.

4. Cosmetic surgery as a self-enhancing procedure, like make-up

Make-up is a common go-to for women who prefer to enhance their appearances for selfies. There are hundreds of thousands of Youtube videos teaching women how to do their eyebrows, lips, or contour their faces. The ultimate goal of doing these techniques are certain: to look good in person and to look good in photos. In some instances, it can even go as much as going under the knife to enhance one’s appearance. An example of this is seen in some Asian countries, particularly in South Korea. Some women undergo the double eyelid cosmetic surgery to make their eyes look bigger and brighter. The procedure is so common that women who undergo these procedures talk about it casually with friends and family, and there isn’t even a hint of controversy behind it.

5. Selfies portray a good image that motivates people to undergo cosmetic surgery

People always want to look their best on social media sites. Selfies are one of those tools that people use to remind themselves that they are attractive, they take care of themselves and they can conquer the world. It is one of the portrayers of the ‘good image’ we want others to see on our wall or online feeds. This is what motivates people to keep on being better, to keep on making themselves look beautiful no matter what it takes–including undergoing some cosmetic procedures.

Selfies have become an integral part of social media, and it is important to know how it affects the Cosmetic industry as well. If you are someone who is considering undergoing any surgical procedure, ask yourself this question, “What motivates you?” Remember that the most important thing is you do it more for yourself, to make you happy, sans the selfies.

JMD Furniture

How to Photography Furniture For Your Ecommerce Store

JMD Furniture
Purchasing and Selling Furniture

Purchasing and selling furniture is usually stressful for everyone. The clients want a fast, stress-free, trustworthy experience. For the seller, space can be the most important resource so the inventory moves quickly. For an e-commerce store, the photographs of the furniture are critical to success. There are tips that can help an e-commerce furniture store take just the right photographs.

The Detail

Successfully photographing furniture is about capturing the details. Start by making certain the furniture is clean, including the little nooks because dust will show in a photograph. Any imperfections should be buffed out, and a high-quality furniture polish should be used to make the piece shine. The customer will be expecting the furniture to be in good shape, and if the photograph is unsatisfactory, they will look elsewhere. An excellent example of top photography is JMD Furniture.

Choosing the Right Location

Most furniture will not fit properly into a standard setup for photoshoots. The chosen space should have good lighting and be a minimum of three times larger than the piece of furniture being photographed. Natural light will provide the best effect, but direct sunlight will cause harsh shadows. If the photograph is being taken near a window, use a piece of white paper to diffuse the light. This will soften the effect and enhance the furniture.

The Backdrop

The best way to highlight a piece of furniture is with a crisp, white backdrop. A background stand is inexpensive and will bring out the details of the piece. It is also simple to construct a backdrop. All that is required are a few clamps, and a white piece of paper, or sheet three times bigger than the furniture being photographed. When the transition between the horizontal and vertical planes is seamless, a photography sweep is created.

The Lens

Understanding the lens being used is crucial when photographing furniture. The digital zoom is not important, but the optical zoom can make the photograph. This enables the photographer to get a very close view of the furniture so the details can be clearly seen. A digital zoom simply allows the photographer to crop the photo. The focal length should be at the maximum setting to enable the optical zoom to zero in as much as possible. This means there must be enough distance between the furniture and the camera. If the distance is too close, the photograph can easily become distorted, and not be an accurate reflection of the furniture. The lines of the piece can appear curved, and the photograph will look warped. A proper distance will assure both clarity and straight lines.

The Angle

The angle must be chosen so the top, front and side of the furniture can be seen in one photograph. A photograph taken directly in front of the piece will confuse the customer because it will have a flat appearance. The angle of the camera must display an accurate representation of the furniture and the dimensions.

Taking More Than One Photograph

When additional photographs are taken, the customer can get a better idea as to how the piece looks. The customer is unable to touch the piece and is relying on the photographs for accuracy. Multiple photographs make the customer feel as though they are walking around the piece, and they can envision the furniture in their home.

The Aperture

To get the furniture in focus, the smallest possible aperture is necessary. This will balance out the long focal length and dimensions of the piece. This will additionally reveal all the details of the furniture in the photograph. This is especially important if there is a zoom function in the e-commerce store. The photograph is what will sell the piece, and if the customer is unable to see every detail, chances are good the sale will be lost. JMD Furniture is an excellent example because the quality of the furniture they sell is accurately seen in their photographs.

Simple is Best

Do not try to style the piece by adding items such as plants or a vase. This will distract from the piece, and take the customers eyes away from the furniture. The best photograph is a clear view of the piece with nothing additional added.

Used Furniture

When the furniture being photographed is used, do not try to hide any damage. The customer will not expect perfection and will be greatly disappointed if a major flaw was hidden. The best qualities of the piece should be highlighted, but any damage should be disclosed.

The Reflector

Large shadows can be created by a substantial piece of furniture. A reflector will stop parts of the piece from disappearing into the shadows. The photograph will also look professional if the background is removed.

Top Places In The World To Photograph

Travel photography takes you to various interesting destinations across the world, but as you do it more, you realize you need to explore many more places that can take your career to a higher height. Picking the best places to photograph across the world is a decision that will help you make perfect photos that are not only satisfying to your audience, but you as well. You not only need to consider popular destinations, but as expert photographer Summit Shah explains, there are many more places that are unexplored that you could find ideal for travel photography. Here are suggestions for best places across the world where you can photograph travel photos.

Maruata Bay, Mexico

Just rent an apartment in Maruata and with your stay there, you will appreciate how much the place offers you amazing photography opportunities. This is a destination that is popularly known for tourism and when you head down to Michoacan state, you enjoy a better chance to capture dramatic shots. It offers you amazing image ops, which range from cliffs to wetlands and birds as well as sea turtles.

Don’t miss shots of waves crushing against the cliffs and you could enhance your photography by trying some photos of uncluttered beach sunsets or fishermen at work. This is basically a destination that will give you the joy you have always sought to achieve as a photographer. You will also enjoy some good moments as a tourist apart from documenting moments, and the most adorable part is that the locals there are highly supportive.

Chugach State Park, Alaska

If you have ever dreamt of taking your photography to Alaska, Chugach State Park is the place you should be. The destination has amazing landscapes and is packed with wildlife photo ops that you will appreciate. It is also easily accessible, more than the Denali National Park, and you will not suffer the inconvenience of congestion that you would find at the national park. Some of the key features you could capture while at Chugach include the lakes that are beautifully nested through the terrain of the mountainous landscape.

There are several marshlands filled with swans and the migrating birds will make the view more interesting. You could hike up the Glen Alps to get some aerial views that include the waters that flow in the lake, and one particular section that is interesting is off the coast where you could do some shots of the Beluga whales. If you are lucky to show up during sunset, this is one of the most interesting places to photograph.

Cedar Mesa, Utah

While in the U.S., you have plenty of options for destinations ideal for travel photography. One such place that Summit Shah suggests you should consider is Cedar Mesa in Utah. Photographers love the Colorado Mesa Verde, so you will not find as many people around Cedar Mesa, which gives you the peace of mind you need when doing some sweet shots. Easily capture the Pueblo ruins and awesome cliff dwellings to the southwest. You can achieve perfect photos here without the inconvenience of working around crowds. Don’t miss to photograph textured images of the Anasazi cliff dwellings as well as rock paintings. The sunset offers long-exposure nighttime shots.

Saskatchewan, Canada

Instead of visiting Alberta, you could find a rare opportunity to photograph at Saskatchewan in Canada. If you head to Banff National Park, you will meet hordes of landscape shooters, but at Saskatchewan, which gives you a similar opportunity, you are able to enjoy the space and convenience of shooting without distractions from others. The destination offers miles of rural back roads and these are open roads that tourists rarely use that will lead you to hidden gems including old farms and homesteads that are surrounded by grasslands.

D Scott Carruthers Shares 11 Ways to Get a Real Smile from Wedding Photography Subjects

Photography is a specialty that attracts a lot of interest due to its power to create memories. Many people have wanted to become good photographers but their lack of mentors has dragged the process of getting towards the helm of their success. This is the reason D. Scott Carruthers has championed an initiative aimed at helping upcoming photographers execute their ideas. He has practiced photography for more than 10 years and here are few tips he shares to help you draw genuine smiles from your subjects while taking wedding photographs.

  1. Make it a game

Getting the subject involved is the ultimate way through which you can ensure you get a genuine smile. One of the suggestions you could pursue is telling them to put on strange faces to see who does it best, and amid this unexpected activity you will get many smiles as they find it laughable and awkward.

  1. Stare lovingly

Since in a wedding you are most likely to be photographing the couple, you could ask them to stare at each other lovingly. Obviously this is a vague suggestion as they will be confused how to best do it, which will definitely get them blown up in smiles and laughs.

  1. Tell something funny

Although not everyone might be good at this, you might squeeze in some jokes related to the day. The rule is to tell something they can relate with and digest easily if you want to get them taken away in beautiful smiles that will help make the photos amazing. It is just about playing with their psychology in a manner that will have them relax to enjoy the moment.

  1. Approach with a smile

The psychological effect of approaching with a smile on is strong as you are able to trigger the couple to as well feel easy around you. Putting on a strong face might trigger them to feel that you are handling a very complex process and thus everyone must remain silent all through, which is not going to help you get genuine smiles.

  1. Compliment them

A compliment boost one’s mood and ego and as research has shown, when you compliment someone they are highly likely to feel good about themselves. Therefore, telling your subjects they look good together might sound simple but the effect is far reaching, and with that easy mention you will get them smiling.

  1. Ask a trick question

Asking a trick question that at the same time gets them to suspect you want information from them is also a perfect way you could get people smiling for photos. While they will try to figure out the best answer for the question, it will get them smiling as everyone tries to outdo the other in getting it right.

  1. How did you meet?

While photographing a couple, this question is important to them as it reflects their beautiful past and the point where their love kicked in. Most definitely, they will put on smiles before anyone comes up with a response to the question.

  1. Kiss her on the cheek/nose/forehead

Many happy couples will wear a beautiful smile when asked to intimately kiss each other before a camera. It’s a wild suggestion that will get them energized to embrace the moment, and with this you can be assured to get genuine smiles.

  1. Ask a dance

If the subjects are having hard time relaxing, you could get them moving and make sure to focus their attention far from the camera. It’s easy to get a couple to embrace a dance session with joy and the fact this will be before a camera they will be triggered to wear beautiful smiles.

  1. Ask for a laugh

You could as well ask them to laugh and research has shown that fake laughs gradually turn into giggles. Continue clicking until the laugh turns real and just like that you will help to create beautiful photos.

  1. Tell each other a secret

It will also sound strange when you tell them to whisper a secret to each other, and amid this process will come beautiful smiles. Most definitely, the secret in this case will include love messages to each other.

D Scott Carruthers is a world class photographer as well as a traveler and lover of all things vegan. You can see more of his content at carruthersphoto.com


Noelle Neff Shares Vital Advice Every New Photographer Must Consider

For those who have been shooting for many years, there is a clear understanding of the basics of photography that inspire them to keep their work organized and neat. However, beginners will have a problem mastering the right path to pursue to make their skills worthwhile. This is a dilemma many have to deal with as there is a wide array of information that speaks different things that they are supposed to embrace. As Noelle Neff cites, you have to consider the basic guidelines and principles to become a perfect photographer. Here are few you might find useful.

Learning first, gear second
You might have heard many people suggest that you should spend more of your money on gaining experience over other things. A lot of scientific research has revealed that spending more on a photography workshop will help you gain vital skills that eventually define the way your career as a photographer progresses. Don’t rush into buying equipment before you familiarize with the most important principles of photography that you must apply to become a professional in the area. Getting that new 1Dx will not help you become better if you don’t understand how to use it, so spend more on education and forget about getting the gear for now.

Shoot for yourself
Many people start losing it when they begin shooting to satisfy others or show the world. That is when the problem begins as getting people to appreciate the little effort you put is not as easy, and one might get dejected due to the lack of positive feedback. To counter this problem, you are advised to shoot for yourself before you ever consider about doing it for another person or agency. Make sure you satisfy your expectations first before you move forward to working for other people.

Limit yourself on purpose
What is your purpose while photographing? As a beginner, you could achieve more by limiting yourself to one specialty or idea. There are many genres in photography that you could pick, so be sure to pursue these areas with a lot of consideration to the fact that you can easily improve your skills in one area when you put more focus on it rather than doing many genres at the same time. Learning is progressive and one of the ways to ensure you benefit is picking one genre you are familiar with and exhausting its options before picking another.

Join a community
Doing photography in isolation might slow your progress since there are no people with similar ideas to share with or consult. There are many communities you could join especially in the social media space that are made specifically to host photographers. And within these circles you can easily find valuable support from people who have years of experience working as photographers. You cannot easily see your mistakes, but with someone else who is experienced it’s easy to see where you are getting it wrong.

Finally, practicing should be a normal routine that you must adhere to religiously. To become perfect, you need to do it many times and borrow ideas from those who have already established themselves as experts in photography. This will accelerate your growth as a photographer and before long, you might be the one teaching others about the beautiful art of photography.