wedding venues in Phoenix

Choosing Your Phoenix Wedding Venue: 9 Must-Have Features

Assessing Your Wedding Style and Vision

So, you’re planning your dream wedding in Phoenix. Congratulations! Between the gorgeous weather and stunning desert scenery, Phoenix has so much to offer for your special day. But with so many wedding venues in Phoenix to choose from, how do you find the perfect place to host your wedding festivities? As you start touring locations, there are a few must-have features you’ll want to keep in mind.  From size and style to catering options and extras, choosing the right wedding venue is key to crafting your ideal celebration. Whether you envision an intimate gathering or a grand-scale event, the perfect Phoenix venue is out there waiting for you. Keep reading to discover the top things to consider as you embark on this exciting part of your wedding planning journey!
wedding venues in Phoenix

Key Logistics for Phoenix Wedding Venues

The first thing you’ll want to consider is the overall style and vision for your big day. Are you dreaming of a formal ballroom wedding or a casual beach bash? A rustic barn venue or modern loft space?

Once you’ve narrowed down the vibe, think about must-have features. For a formal wedding, a large open space for dining and dancing plus a separate area for cocktails are a  must. For a casual beach wedding, look for oceanfront access and lots of natural light. A rustic barn calls for wooden beams, string lights and greenery while an urban loft needs an industrial-chic space with high ceilings.

Also determine if you want an all-in-one venue  that provides catering and bar service or if you prefer a DIY blank canvas where you can bring in your own vendors. Consider how many guests you plan to invite as well as if you want indoor and outdoor spaces.

Other factors to keep in mind include:

– Accessibility for your guests with ample parking 

– Flexibility in layout to customize the space

– Available accommodations onsite or nearby 

– Photo-friendly spots for engagement and wedding photos

– Permits required for elements like live music, open flames or fireworks

 Choosing a venue that aligns with your wedding vision and has all the features you need will help ensure you have the perfect place to celebrate your new beginning. Take your time exploring all the options –  this is one of the most important decisions you’ll make!

Top 9 Features to Look for in Phoenix Wedding Venues

When choosing a wedding venue in Phoenix, there are a few key logistics to consider.  

Location

Make sure the venue is in an area convenient for you and your guests.  If it’s too far from hotels or the airport, it may be difficult for out-of-town guests to attend. Look for venues centrally located or near major transportation hubs.

Capacity 

Choose a venue that can comfortably accommodate all your guests.  Too small of a space will feel cramped, while too large of a space won’t have the intimate feel you want.  Think about both the ceremony and reception, and any venue tours should discuss maximum capacities for different setups.  

Parking

There’s nothing worse than a lack of parking for an event.  Look for venues with on-site parking that can fit the number of expected guests.  If parking is limited, consider venues near public transit or that offer shuttle services.  

Catering

Many venues will require you to use their in-house catering, while some allow you to choose your own caterer.  If you have a specific caterer in mind, check that the venue allows outside catering and has a proper kitchen facility.  Venues with in-house catering may be more convenient but offer less flexibility.  

A/V Equipment

Make sure the venue has high-quality audio and visual equipment for things like playing music, giving toasts, and showing slideshows.  Check if they allow outside A/V vendors or if they have staff to operate the equipment.  The last thing you want is technical difficulties on your big day!

With the right venue that meets all your needs, you’ll be well on your way to planning a Phoenix wedding your guests will never forget.
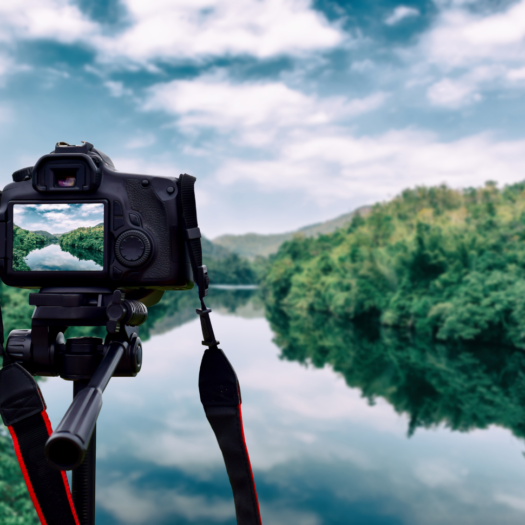
5 Photography Careers to Consider

Are you looking to make photography a career? You may be surprised by the number of possible careers available in the field. Whether you want to work for yourself or someone else, many paths can lead to success. In this article, we will explore five different potential careers as a photographer and give an overview of what each entails so you can find what’s right for you!

1. Professional Photographer

Being a professional photographer can include a wide variety of jobs, from personal portrait photography to photojournalism in war zones. A professional photographer has a high level of experience and usually specializes in one area, such as weddings or real estate photos.

Professional photographers can work for themselves or with a company. In either case, they are responsible for acquiring new clients and managing their business to make sure it runs smoothly. For example, some professionals may handle all the marketing while others hire an assistant to attend meetings to free up more time shooting weddings!

To become a professional photographer, you need extensive experience in photography and sales skills so that potential customers will want your services instead of someone else’s. You also should be familiar with equipment such as high-end cameras, lenses, and lighting gear since you’ll likely use these items every day on shoots.

As mentioned above, this career path is excellent if you enjoy working alone but not great if you like collaboration because much of the work is done alone!

A professional photographer typically requires a Bachelor’s degree in photography or another related field such as art. You also need to complete many hours of internships and volunteer programs before you can find paying jobs. When it comes to making money, most professional photographers earn salaries that range from $20-50k per year, depending on their experience and expertise. Many professionals also supplement income with sales commissions earned for finding new clients.

2. Photojournalist

Photojournalists are responsible for taking photos that tell a story. Their work can be found in newspapers, magazines, and online news outlets to illustrate current events or create beautiful everyday life images.

Like professional photographers, photojournalists typically specialize in one area, such as sports photography. Still, some shoot many different photos depending on the market they serve (i.e., fashion vs. war). Photojournalists also need experience with journalism skills since their job is usually to cover stories rather than take pretty pictures!

For example, if Warren Buffet walked into your studio, you wouldn’t ask him what he wanted to be photographed; it’s his job to say, “take my picture!” Similarly, you don’t have time to think about the best angles or lighting when covering breaking news. You need to be able to snap a photo and move on quickly before something else happens!

Photojournalists usually work for local newspapers, cable news stations, and wire services such as Associated Press (AP). Photojournalism is an excellent career option because there will always be a demand for photographs that tell stories in new ways. There are even opportunities overseas since photojournalists can provide valuable insights into what’s happening outside of America! This job requires extensive experience, so most professionals have Bachelor’s degrees in photography and take courses in journalism, which helps them learn how to approach their jobs from different angles.

As with professional photographers, income varies greatly depending on your level of expertise. Some make less than $20k per year, while top photojournalists can earn over $100k.

Photojournalist typically requires a bachelor’s degree in photography, journalism, or communications with an emphasis on the latter since you’ll need to know how to approach your work from different angles! You also should have years of experience shooting photos for newspapers and other media outlets before transitioning into this career path. 

3. Photo Editor 

Photo editors are responsible for choosing photos that appear in newspapers, magazines, and other media outlets. This job typically requires a bachelor’s degree in journalism or communications with an emphasis on photography since you’ll need to know how to choose the best shots from a photographer’s portfolio as well as being able to communicate your thoughts.

This career path is excellent if you enjoy working alone but not great collaboration because much of the work can be done alone! In addition, photo editors usually don’t have time to take their photos, so they must rely on photographers for this task which means it might affect availability or costs depending on what types of shoots you’re doing at any given moment.

Income varies greatly depending on your level of expertise; some make less than $20k per year, while top photo editors can earn over $100k.

Photo editor typically requires a bachelor’s degree in journalism or communications with an emphasis on photography since you’ll need to know how to choose the best shots from a photographer’s portfolio as well as being able to communicate your thoughts! You also should have years of experience working with photographers before transitioning into this career path. Photo editing is excellent if you enjoy working alone but not great if you like collaboration because much of the work can be done alone. There might be conflicts about availability and costs depending on what types of shoots you’re doing at any given moment.

4. Digital Artist 

Digital artists create graphics and design concepts for advertisements, newspapers, and magazines for various media types. This career path is excellent if you enjoy working alone but not great collaboration because much of the work can be done alone! In addition, digital artists typically don’t have time to take their photos, so they must rely on photographers for this task which means it might affect availability or costs depending on what types of shoots you’re doing at any given moment.

Income varies greatly depending on your level of expertise; some make less than $20k per year, while top digital artists earn over $100k.

Digital artist typically requires a bachelor’s degree in graphic design or a related field with an emphasis on computer graphics and digital imaging since you’ll need to know how to create designs using computers as well as being able to communicate your ideas. You also should have years of experience working with photographers before transitioning into this career path. Digital art is excellent if you enjoy working alone but not great if you like collaboration because much of the work can be done alone, and there might be conflicts about availability and costs depending on what types of shoots you’re doing at any given moment.

5. Freelance Photographer

Freelance photographers are self-employed individuals who shoot photos for various media outlets, including newspapers, magazines, and businesses. Damon Becnel says this career path is excellent if you enjoy working alone but not great collaboration because much of the work can be done alone! In addition, freelance photographers typically don’t have time to take their photos. They must rely on photographers for this task which means it might affect availability or costs depending on what types of shoots you’re doing at any given moment.

Income varies greatly depending on your level of expertise; some make less than $20k per year, while top freelance photographers can earn over $100k.

If you’re looking for a career that combines creativity and travel with some stability, photography might be the perfect fit. There are many different types of careers in this field to consider. We hope these options have helped you get started thinking about what type of photographer will suit your needs best!

Stephen Stepaniuk

Stephen Stepaniuk Offers His Travel Knowledge To Others

Stephen Stepaniuk has managed to strike the perfect balance between work and play. He understands that an inability to juggle both means that so many people never get the chance to take advantage of the joys of travel. That is why he is currently offering his know-how and how-to-travel advice to others to help kickstart their bucket lists.

Are you ready to travel the world your way? If so, visit, https://www.stephenstepaniukadventures.com to learn more

Tana-Taylor-Adoption

Best 5 Tips On How To Communicate With Your Photography Clients

When starting a photography company, there are a lot of things to consider. Factors such as branding, knowing who and where to market, and communicating well with your clients are all important things to consider when you are a self-employed photographer.

In many instances, the cause of frustration for clients is brought about by miscommunication before and during the photo shoot sessions. Many things may be unclear such as pricing, contract agreement, venue, expectations, and others.

Tana Taylor Adoption, a known company that specializes in and adoption photography, gives us their best tips on how to communicate better to photography clients.

Provide samples of your work.

Before accepting an agreement between a client, you need to set their expectations straight. They must get a “feel” of your creative style, and if their preferences suit this specific style. Some clients would be rushing in the process that they forget to consider if their choices are suitable for what you have to offer.

Thus, it is important to show your work initially by sending in samples from old clients. Needless to say, show your latest projects because photography styles evolve over time.

Provide a clear budget.

It is not advisable to say that it’s up to the client to set up their price or your price is negotiable. Although in some instances this may work, most of the time it causes confusion and blurry expectations about the pricing.

According to Tana Taylor Adoption, setting a standard price sets you apart from the rest. It helps you position yourself as a business who knows what they are doing and have clear-cut prices for each service you offer. There are many ways to go about standard pricing. First, you can create packages of your services–some photographers like categorizing them per event such as wedding package, birthday package, etc. Some try to package it by amounts such as 100 candid shots and 50 professional shots.

It all depends on how you want, but standard pricing will help to set things straight about payments and expectations.

Set up appointments and call times.

Preparation is essential when it comes to photography, whether it’s an event or something done in a studio. At least 1-2 weeks prior to the event, it may be helpful to set a date and time to come in early and do some preparations.

Some photography sessions need more preparations such as nuptial and prenuptial shoots, and others require less such as birthdays and corporate events. Also, consider the time you will be setting up your equipment if you have a large production team.

Give reminders of what clients need to bring on shoot day.

If clients need to bring something, such as payments, props, their own makeup team, or something else, give reminders. Often, some clients tend to forget these details especially if they are preparing for a big event.

A day before, it would be good to provide reminders of what your clients need to bring so that your sessions will be smooth-sailing.

Give a short brief on shoot day.

Tana Taylor Adoption also suggests making a short overview of the things you will be doing in the photo shoot. This is important to help keep the whole team in check with their schedule, and how they can work around it to meet what is needed. If time is flexible, shortly discuss the activities that you will be doing for the day.

As you consider these tips, you will have greater chances of communicating effectively with your photography clients.

Ismail-Sirdah

Ismail Sirdah Shares How To Photograph Splashing Water

The Effect of Motion In Photography

There is absolutely no doubt about it. Photography is a special thing, and that is saying the very least below an understatement. The ability to capture thoughts, emotions, and feelings, not to mention un-repeatable actions, within a single small still frame, is truly no less than a miracle at best. In fact, it is the very reason why some have chosen to devote their entire lives to this pursuit. Beauty is in any art, and with photography, it is no different. Professional Photographer, Ismail Sirdah has some tips on how to photograph splashing water.

Did you ever just stop to ask yourself exactly how all of this happens in one or two seconds? Well, that is a part of the mystery in the beauty itself, the ability to capture motion in a photograph and to keep it in one’s heart forever. For it is not an easy task, no, far from it. In fact, if you thought that shooting any still frame alone and capturing it just perfectly was a challenge difficult enough both in and of itself, then you have still quite a bit of learning to do in this field of expertise. For there is something far more difficult to pull off, and that is taking a photo of moving liquid or water when it is in motion.

Doing This “Just Right”: It May Take a Bit More Than a Try

“The setup is probably the most important part in taking a water splash photo. The first thing to do is get your backdrop and surface ready. Once you found your surface make sure the backdrop right behind it. Setup your camera. What you want to do at this point is make sure all the camera sees is black….”

After this has been prepared and adjusted as you see fit, you will want to set your camera’s different apertures to any range from around f/4 to 300 Isotopes per second as is the suggested range. Next, do not use JPEGS when choosing final image layouts. RAW files have always tended to work better and have always given that extra bit of clarity to the finished photo’s overall look. Have all forms of flash, plus reflecting equipment, on and set at a proper angle. Take a few practice shots from different angles to best decide what exactly that may be for you and your visual taste in particular.

Also, you will then want to set a timer. The proper timer and its amount are crucial to the success of that perfectly captured image. This cannot be stressed enough. Do not forget that practice makes forget, and trial and error are wonderful teachers to be had in all of life’s first experiences. Play around with your camera and equipment on these settings until you get that perfect shot to your very own liking.

When you are ready, drop an apple into a water cup or full bathtub for the motion. Capture. Re-capture. Repeat. Re-edit.

Avery Arjang

Avery Arjang Shares Why She Recommends Using Fluorescent Photography When Capturing Natur

Avery Arjang

Avery Arjang, a popular photographer, loves taking photos of nature and landscapes. Though she enjoys sharing her photos with the world, she also hopes to share her advice with photographers of all sorts. In fact, one of the biggest tips that Arjang has shared with the world is the use of fluorescent lighting when taking photographs of nature. Here is why she chooses to use this sort of lighting in her nature photography.

What is Fluorescent Lighting

You’ve probably seen these bulbs either in your kitchen or a building. Some street lamps even use them to keep the street eliminated. They are energy efficient bulbs that are also relatively inexpensive to use. While they are used highly in the normal world, they are very rarely used in photography. There is a reason why. Since fluorescent light has a different color and a flicker in the lighting source, it can make it difficult to use these for photography. However, Arjang thinks that fluorescent lighting is the key to getting incredible nature photos!

Finding the Good Light

Flicker has to be one of the biggest problems with fluorescent lighting, but when you figure out the change in the lighting, you can capture the best photos in the cycle. Flicker is a constant cycle where the lights change in intensity and color. The cycle is somewhere around 1/50 a second, and if you time your photo right, you can get some pretty interesting color changes. Many people will jump into fluorescent photography by setting their camera on the continuous shooting, but that often leaves people with photos full of distorted colors and light.

Arjang’s suggestion is to set your camera to a shutter speed of 1/50 a second to capture the full light cycle of the bulbs. Sometimes, this might mean playing around with the shutter speed to get the best photos of the cycle, and it might mean grabbing your remote shutter and a tripod to keep things steady during the exposure. However, since this is such a quick exposure, it might not require those things.

Playing with the Color

Fluorescent light can have some crazy colors, and if you’re not a fan of the harsh color, you can easily change it by changing the settings on your camera. Avery Arjang suggests putting your camera toward the light to see how the different colors and white balance can change the shades in the photos. Just one simple change of the white balance to daylight can produce a beautiful change in the photograph. When photographing nature, these subtle color shifts under the fluorescent light can make a huge difference in the quality of your photo.

How the Light Effects Nature

If you are photographing a green plant, and you are using fluorescent light to do so, you might find that it provides a greener effect to your photos. In other words, your photo looks more vivid. Arjang knows this to be true, which is why she prefers to use fluorescent lighting to bring out the vivid colors and details in nature photography.

When traveling outdoors to take nature photos, it can be handy to have a fluorescent ring light or light box to help bring the lighting outdoors. Some of these lighting options will even attach to your camera. Before snapping the photo, be sure to play with some of the lighting and color settings on your camera to ensure that you are capturing the best photo. Nature photography always looks better when it is vivid and full of bright colors.

Conclusion

When working with fluorescent lighting, it can seem difficult to get the perfect picture under such difficult lighting conditions. However, by changing just a few settings on your camera, you can easily grab a beautiful photo that certainly stands out. Arjang uses fluorescent lighting for her nature photography to help it stand out with vivid colors and details. Just by working with a few new settings and a light box, this photographer shares how you too can get gorgeous nature photos that look straight out of a magazine.

About Avery and Her Photography

An accomplished photographer, Arjang has been working with her camera for many years. She holds great knowledge of various photography skills, and she uses her knowledge to help new and aspiring photographers better grasp the concept of landscape and nature photography. Arjang uses a variety of settings and lighting designs that are unique and tasteful. Her photographs are gorgeous, showing off her excellent skills behind the camera’s lenses. Arjang has been practicing photography for years, and her skills have only grown since her beginnings. This is why she offers heaps of advice to photographers everywhere, and she encourages photographers to get out of their comfort zone, find something unique to shoot and take that photo with confidence.

Ismail Sirdah

Ismail Sirdah Shares 5 Tips For Amazing Black and White Photography

Ismail Sirdah

Black and white photography has a timeless charm that is completely unique from its colored counterpart. It is quite interesting that without color, black and white photography highly relies on play of shadow, contrast and exposure. Black and white photos also can tell a story that stands out from the rest, and definitely creates a different effect that is unique to its monochromatic features. In this post, we will be talking about the benefits of Black and White Photography, and some tips that can help us create stunning black and white photos.

Benefits of Black and White Photography

  1. Creating dramatic effects

Black and white photography can create special effects because of its greyscale properties. Hence, these photos can be more subtle, dramatic, and can highlight certain features of a photo’s composition with the absence of many colors.

  1. Emphasis on lighting

With black and white photography, you can harness the power of good lighting. Since you won’t rely on colors that can enhance a photo, you will be relying on lighting effects, and you can experiment on different lighting styles to create your black and white photo.

  1. Good variety along with colored photos

If you have clients who want multiple photos, it can be ideal to provide black and white as well as colored versions of certain photos. Since black and white photos can be more dramatic and can give highlight to certain features that may go unnoticed with colored photos, it can serve as a good variety to mix up in a client’s image set.

5 Tips for Amazing Black and White Photography

Here are some things you can do to create beautiful black and white photographs.

  1. Focus on shapes and textures

Look for angles that highlight a subject’s position against a background, the uniqueness of its shape or texture. For example, creating travel photography, you can create black and white versions of images by taking photos of an infrastructure with interesting shapes and textures against a plain background. This can exude a more dramatic effect for your photos.

  1. Create a high contrast set

If you are doing studio or still life photography in black and white, it is important to create sets that are usually high contrast. The more difference between an image’s monochromatic features, the more attractive it is as a black and white photo. You can manipulate this by making use of studio lights and placing them in certain angles or cast or remove shadows depending on your preference.

  1. Try increasing your exposure

In situations where you can’t manipulate a set’s lighting, you can adapt by increasing your camera’s exposure. Creating long exposures, especially for darker sets can help you create a contrast that you won’t usually achieve in regular conditions. This results to a better black and white photo for nature photography with dim light conditions. Make sure to use a tripod for situations you would need long exposures, to prevent blurring of photos.

  1. Make use of filters

It can also be helpful to utilize a camera accessory such as polarizing and Graduated neutral density filters to help you retain details on a photo white increasing the contrast between its black and white tones. Through the use of filters, you can also increase the contrast in a photo’s black and white features without compromising small details such as textures or small objects than can be obscured through the absence of color. Colored filters, such as red and orange ones during a shoot can also be helpful if you are a film photographer who wants a better black and white image during processing.

  1. Dodge and Burn Tool

Another trick that you can do during image editing and processing is the use of dodge and burn tool. If you have a photo that was originally taken from colored, but looks less appealing in black and white, you may want to make use of the dodge tool to create highlights and burn tool to create shadows. There are 3 settings for both features: highlights, midtones and shadows. You can pick which lighting aspect needs to be lightened or darkened depending on your photo, and what results is a black and white image with better contrast.

Black and white photos have their own uniqueness that can only be achieved by doing specific tricks. Making use of these tips will help you produce black and white images that are beautiful and one-of-a-kind for your clients.

Author Bio: Ismail Sirdah is a professional photographer. He is an established photographer that has gained recognition in his earlier years through the feature of his work in several local publications. He was also able to cover events featuring several media personalities and public icons.

JMD Furniture

How to Photography Furniture For Your Ecommerce Store

JMD Furniture
Purchasing and Selling Furniture

Purchasing and selling furniture is usually stressful for everyone. The clients want a fast, stress-free, trustworthy experience. For the seller, space can be the most important resource so the inventory moves quickly. For an e-commerce store, the photographs of the furniture are critical to success. There are tips that can help an e-commerce furniture store take just the right photographs.

The Detail

Successfully photographing furniture is about capturing the details. Start by making certain the furniture is clean, including the little nooks because dust will show in a photograph. Any imperfections should be buffed out, and a high-quality furniture polish should be used to make the piece shine. The customer will be expecting the furniture to be in good shape, and if the photograph is unsatisfactory, they will look elsewhere. An excellent example of top photography is JMD Furniture.

Choosing the Right Location

Most furniture will not fit properly into a standard setup for photoshoots. The chosen space should have good lighting and be a minimum of three times larger than the piece of furniture being photographed. Natural light will provide the best effect, but direct sunlight will cause harsh shadows. If the photograph is being taken near a window, use a piece of white paper to diffuse the light. This will soften the effect and enhance the furniture.

The Backdrop

The best way to highlight a piece of furniture is with a crisp, white backdrop. A background stand is inexpensive and will bring out the details of the piece. It is also simple to construct a backdrop. All that is required are a few clamps, and a white piece of paper, or sheet three times bigger than the furniture being photographed. When the transition between the horizontal and vertical planes is seamless, a photography sweep is created.

The Lens

Understanding the lens being used is crucial when photographing furniture. The digital zoom is not important, but the optical zoom can make the photograph. This enables the photographer to get a very close view of the furniture so the details can be clearly seen. A digital zoom simply allows the photographer to crop the photo. The focal length should be at the maximum setting to enable the optical zoom to zero in as much as possible. This means there must be enough distance between the furniture and the camera. If the distance is too close, the photograph can easily become distorted, and not be an accurate reflection of the furniture. The lines of the piece can appear curved, and the photograph will look warped. A proper distance will assure both clarity and straight lines.

The Angle

The angle must be chosen so the top, front and side of the furniture can be seen in one photograph. A photograph taken directly in front of the piece will confuse the customer because it will have a flat appearance. The angle of the camera must display an accurate representation of the furniture and the dimensions.

Taking More Than One Photograph

When additional photographs are taken, the customer can get a better idea as to how the piece looks. The customer is unable to touch the piece and is relying on the photographs for accuracy. Multiple photographs make the customer feel as though they are walking around the piece, and they can envision the furniture in their home.

The Aperture

To get the furniture in focus, the smallest possible aperture is necessary. This will balance out the long focal length and dimensions of the piece. This will additionally reveal all the details of the furniture in the photograph. This is especially important if there is a zoom function in the e-commerce store. The photograph is what will sell the piece, and if the customer is unable to see every detail, chances are good the sale will be lost. JMD Furniture is an excellent example because the quality of the furniture they sell is accurately seen in their photographs.

Simple is Best

Do not try to style the piece by adding items such as plants or a vase. This will distract from the piece, and take the customers eyes away from the furniture. The best photograph is a clear view of the piece with nothing additional added.

Used Furniture

When the furniture being photographed is used, do not try to hide any damage. The customer will not expect perfection and will be greatly disappointed if a major flaw was hidden. The best qualities of the piece should be highlighted, but any damage should be disclosed.

The Reflector

Large shadows can be created by a substantial piece of furniture. A reflector will stop parts of the piece from disappearing into the shadows. The photograph will also look professional if the background is removed.

D Scott Carruthers Shares 11 Ways to Get a Real Smile from Wedding Photography Subjects

Photography is a specialty that attracts a lot of interest due to its power to create memories. Many people have wanted to become good photographers but their lack of mentors has dragged the process of getting towards the helm of their success. This is the reason D. Scott Carruthers has championed an initiative aimed at helping upcoming photographers execute their ideas. He has practiced photography for more than 10 years and here are few tips he shares to help you draw genuine smiles from your subjects while taking wedding photographs.

  1. Make it a game

Getting the subject involved is the ultimate way through which you can ensure you get a genuine smile. One of the suggestions you could pursue is telling them to put on strange faces to see who does it best, and amid this unexpected activity you will get many smiles as they find it laughable and awkward.

  1. Stare lovingly

Since in a wedding you are most likely to be photographing the couple, you could ask them to stare at each other lovingly. Obviously this is a vague suggestion as they will be confused how to best do it, which will definitely get them blown up in smiles and laughs.

  1. Tell something funny

Although not everyone might be good at this, you might squeeze in some jokes related to the day. The rule is to tell something they can relate with and digest easily if you want to get them taken away in beautiful smiles that will help make the photos amazing. It is just about playing with their psychology in a manner that will have them relax to enjoy the moment.

  1. Approach with a smile

The psychological effect of approaching with a smile on is strong as you are able to trigger the couple to as well feel easy around you. Putting on a strong face might trigger them to feel that you are handling a very complex process and thus everyone must remain silent all through, which is not going to help you get genuine smiles.

  1. Compliment them

A compliment boost one’s mood and ego and as research has shown, when you compliment someone they are highly likely to feel good about themselves. Therefore, telling your subjects they look good together might sound simple but the effect is far reaching, and with that easy mention you will get them smiling.

  1. Ask a trick question

Asking a trick question that at the same time gets them to suspect you want information from them is also a perfect way you could get people smiling for photos. While they will try to figure out the best answer for the question, it will get them smiling as everyone tries to outdo the other in getting it right.

  1. How did you meet?

While photographing a couple, this question is important to them as it reflects their beautiful past and the point where their love kicked in. Most definitely, they will put on smiles before anyone comes up with a response to the question.

  1. Kiss her on the cheek/nose/forehead

Many happy couples will wear a beautiful smile when asked to intimately kiss each other before a camera. It’s a wild suggestion that will get them energized to embrace the moment, and with this you can be assured to get genuine smiles.

  1. Ask a dance

If the subjects are having hard time relaxing, you could get them moving and make sure to focus their attention far from the camera. It’s easy to get a couple to embrace a dance session with joy and the fact this will be before a camera they will be triggered to wear beautiful smiles.

  1. Ask for a laugh

You could as well ask them to laugh and research has shown that fake laughs gradually turn into giggles. Continue clicking until the laugh turns real and just like that you will help to create beautiful photos.

  1. Tell each other a secret

It will also sound strange when you tell them to whisper a secret to each other, and amid this process will come beautiful smiles. Most definitely, the secret in this case will include love messages to each other.

D Scott Carruthers is a world class photographer as well as a traveler and lover of all things vegan. You can see more of his content at carruthersphoto.com


Noelle Neff Shares Vital Advice Every New Photographer Must Consider

For those who have been shooting for many years, there is a clear understanding of the basics of photography that inspire them to keep their work organized and neat. However, beginners will have a problem mastering the right path to pursue to make their skills worthwhile. This is a dilemma many have to deal with as there is a wide array of information that speaks different things that they are supposed to embrace. As Noelle Neff cites, you have to consider the basic guidelines and principles to become a perfect photographer. Here are few you might find useful.

Learning first, gear second
You might have heard many people suggest that you should spend more of your money on gaining experience over other things. A lot of scientific research has revealed that spending more on a photography workshop will help you gain vital skills that eventually define the way your career as a photographer progresses. Don’t rush into buying equipment before you familiarize with the most important principles of photography that you must apply to become a professional in the area. Getting that new 1Dx will not help you become better if you don’t understand how to use it, so spend more on education and forget about getting the gear for now.

Shoot for yourself
Many people start losing it when they begin shooting to satisfy others or show the world. That is when the problem begins as getting people to appreciate the little effort you put is not as easy, and one might get dejected due to the lack of positive feedback. To counter this problem, you are advised to shoot for yourself before you ever consider about doing it for another person or agency. Make sure you satisfy your expectations first before you move forward to working for other people.

Limit yourself on purpose
What is your purpose while photographing? As a beginner, you could achieve more by limiting yourself to one specialty or idea. There are many genres in photography that you could pick, so be sure to pursue these areas with a lot of consideration to the fact that you can easily improve your skills in one area when you put more focus on it rather than doing many genres at the same time. Learning is progressive and one of the ways to ensure you benefit is picking one genre you are familiar with and exhausting its options before picking another.

Join a community
Doing photography in isolation might slow your progress since there are no people with similar ideas to share with or consult. There are many communities you could join especially in the social media space that are made specifically to host photographers. And within these circles you can easily find valuable support from people who have years of experience working as photographers. You cannot easily see your mistakes, but with someone else who is experienced it’s easy to see where you are getting it wrong.

Finally, practicing should be a normal routine that you must adhere to religiously. To become perfect, you need to do it many times and borrow ideas from those who have already established themselves as experts in photography. This will accelerate your growth as a photographer and before long, you might be the one teaching others about the beautiful art of photography.